Your submission was sent successfully! Close

You have successfully unsubscribed! Close

Thank you for signing up for our newsletter!
In these regular emails you will find the latest updates about Ubuntu and upcoming events where you can meet our team.Close

Install Ubuntu on a Chromebook

1. Overview

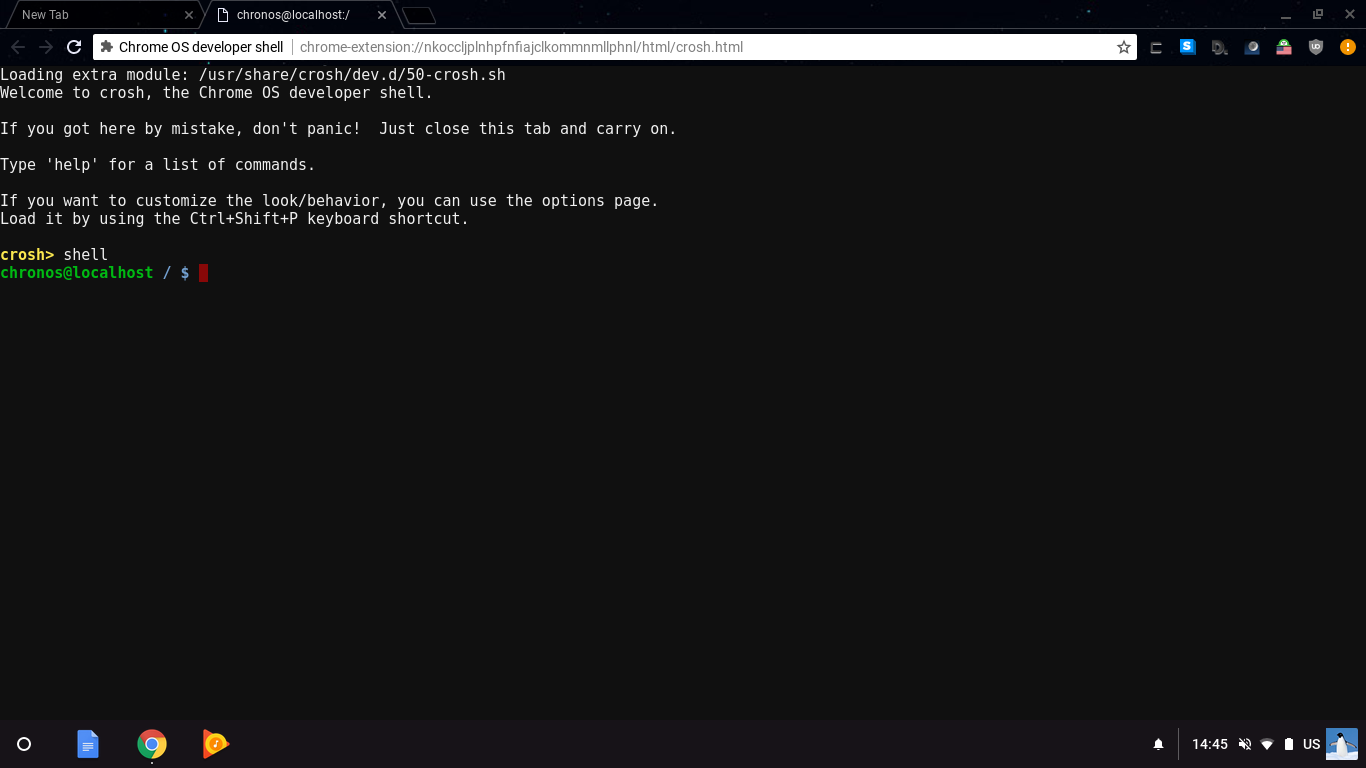
Today we’ll be installing Ubuntu on your Chromebook, while preserving your original ChromeOS system.

We will use a third-party script called crouton to install Ubuntu using a chroot, giving Ubuntu its own “pretend” root directory system on your machine. This lets you run ChromeOS and Ubuntu side-by-side, being able to flip between the two on-the-fly.

What you’ll learn

  • How to put your Chromebook into developer mode
  • How to install Ubuntu in a chroot on it
  • Practical and entertaining uses for Ubuntu on Chromebooks

What you’ll need

  • A Chromebook (Intel/ARM CPU)
  • Some basic command-line knowledge
  • At least 1 GB of free storage space

crouton is not part of the Ubuntu project
While we love the value that crouton provides, please note that crouton is a third-party script. It is not provided by nor supported by Canonical nor by the Ubuntu project. Updates to Chrome OS may also make Ubuntu installations inaccessible, as has happened in the past. Use of crouton is at your own risk.

NVidia Tegra CPUs
The Tegra CPU needs additional drivers not covered in this tutorial. We will add a tutorial covering this in the future (or why not contribute one?).

Originally authored by Canonical Web Team


2. Enabling Developer Mode

By default, Chromebooks don’t allow us to use chroots out-of-the-box. We will need to put our machine into Developer Mode to grant us this power.

Before Getting Started
Placing your device into Developer Mode will wipe all data and user information from it. Since ChromeOS is an online-centric operating system, the vast majority of your data will be stored remotely, but make sure you’ve backed up everything important that’s local to your machine before you begin. This could include important data like any files you’ve downloaded, or locally cached passwords. The use of Developer Mode may void your Chromebook’s warranty.

To get to Developer Mode, we need to first reboot into Recovery Mode. On most Chromebooks, you do so by turning the device off, then holding down the ESC and Refresh keys while you press the Power button.

Once in this mode, press Ctrl-D. You will be prompted with an opportunity to “turn OS verification OFF”. Press Enter to do so.

When you boot up your Chromebook, it will begin with a warning screen noting that “OS verification is OFF”. You will need to press Ctrl-D to continue. Your device will now transition to Developer Mode.

Every boot thereafter will also begin with that warning screen, and a need to press Ctrl-D to continue. Do not follow the onscreen instructions to turn OS verification on, or you risk wiping your machine’s data and turning Developer Mode off.


3. Installing Ubuntu with crouton

Empowered with Developer Mode, we will download the crouton script at this link.

Then we will open up a shell by pressing Ctrl-Alt-T, and then typing shell. Now we have a full bash shell at our fingertips.

For a simple setup, we’re going to type sudo sh ~/Downloads/crouton -t unity. This will download the Ubuntu 16.04 packages with the default Unity desktop environment.

You’ll see your terminal processing these packages one by one. This will take some time, so feel free to browse the web on ChromeOS, have a snack, or browse the web while having a snack.

Alternative Installation Options
Depending on the specification of your device, the Unity desktop may be too demanding to work well for you. If you want a more lightweight system, you can install LXDE or XFCE by replacing -t unity with -t lxde or -t xfce. GNOME fans can also try -t gnome instead. You can also encrypt your chroot with a passphrase by adding -e to the end of the installation command before excuting it. This will require that you type in the encryption password you’ve chosen each time you enter the chroot environment.


4. Switching between OSes

With the installation complete, you will be prompted to enter a username and a password. You will then be brought into a bare-bones Ubuntu setup.

Pressing Ctrl-Alt-Shift-Back and Ctrl-Alt-Shift-Forward will rotate you between ChromeOS and Ubuntu. Logging out of Ubuntu will drop you back into the ChromeOS terminal tab that ran the system.

You can get back to Ubuntu in future sessions by typing sudo startunity into your bash shell.


5. Practical and fun uses for your system

Like playing games? sudo apt install steam in a terminal gets you Valve’s Steam gaming client for Linux-based desktop gaming on your Chromebook. If you’re not a previous Steam user, you’ll need to register an account.

Enjoy irony? sudo apt install firefox. Have fun running Firefox on ChromeOS!

Want to browse for other ideas? sudo apt install gnome-software ubuntu-software gets you the Software tool for access to a wide variety of useful applications. Install LibreOffice for full office productivity, GIMP for desktop image editing, Audacity for audio editng, or Kodi for your multimedia enjoyment. If you’re a developer, install your IDE of choice and hack away!

Really, practically anything you could run on a “real Ubuntu laptop” could be run here. Have fun!


6. Conclusion

Next steps

  • The crouton project is active on GitHub. More documentation is available there to use the tool in additional ways.
  • If you need support, Reddit’s ChromeOS community at r/chromeos is helpful, with many crouton users active there.

Further readings

  • Read more about the project on its GitHub page.
  • Look up how to get your particular device into Developer Mode here.